This guide will run through how to attach an email (along with its attachments) to a case. In this guide our emails are automatically syncing to Hoowla because our email account is connected to our Hoowla account,
Before going further, check that your email account is connected up to your Hoowla account by clicking on profile in the top right then edit profile.

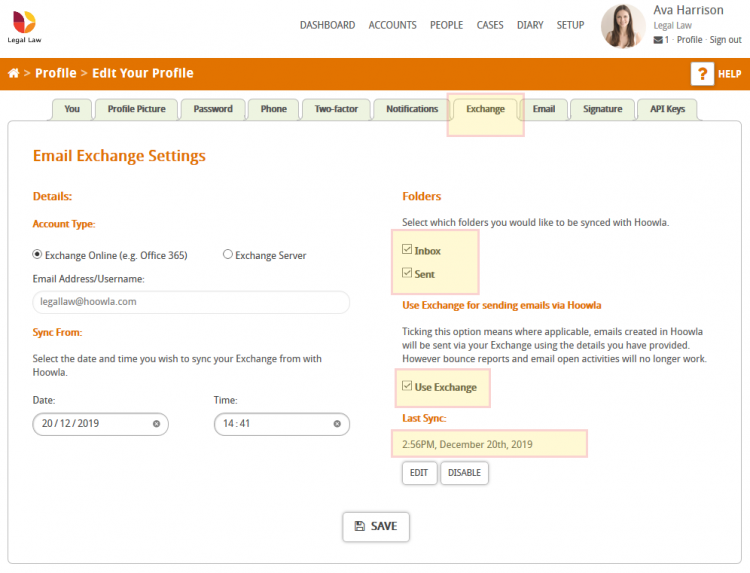
Then click on the exchange tab and ensure that your details are all present and that inbox, sent and use exchange is ticked. Also, the last sync date and time should match when you last received an email.
If your email account is not connected up then please follow this guide
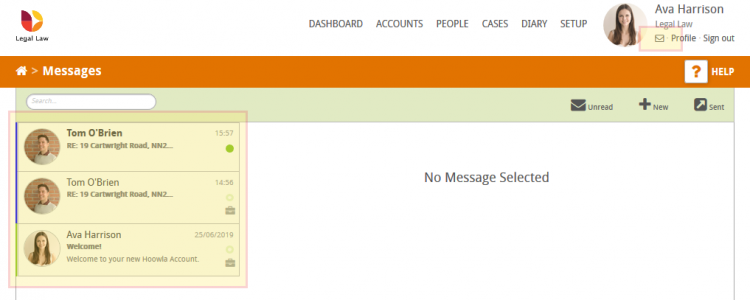
When you are happy that your mailbox is all connected up to your Hoowla account and your emails are syncing, click on the envelope icon in the top right (just under your name). This will take you into messages where you will find all of your emails which have synced from your inbox in the left-hand pane.
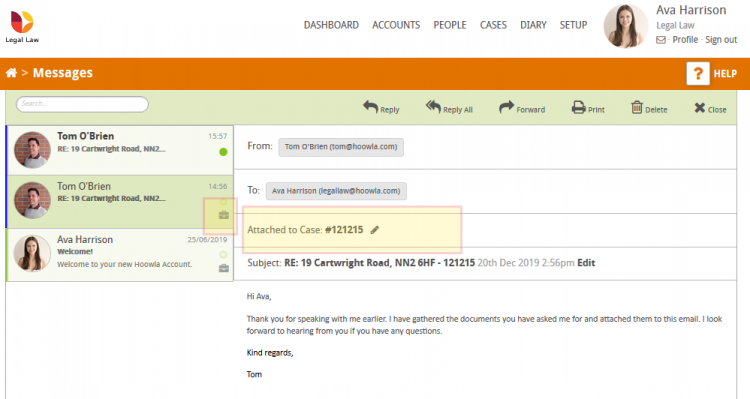
Click on an email in the left-hand pane to load up its contents in the right-hand pane.
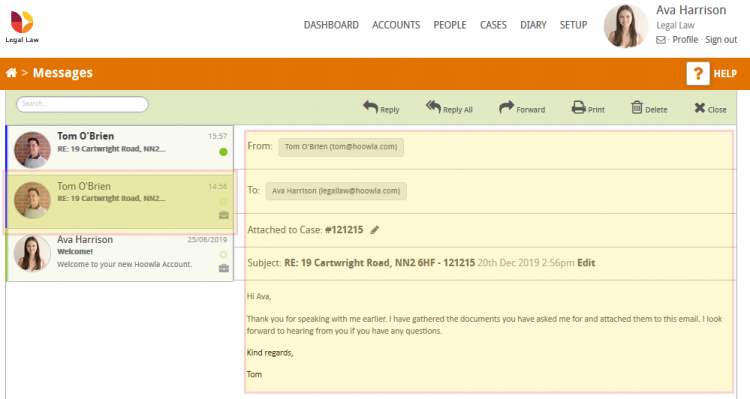
You can see if an email has already been attached to a case as it will have an icon of a briefcase displayed in the left-hand pane and when viewing the email in the right-hand pane it will tell you which case it is attached to.
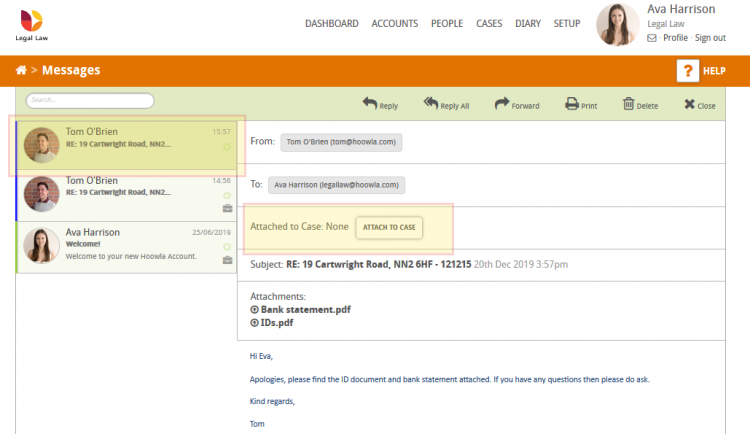
If the email in the left-hand pane hasn’t got an icon of a briefcase then it means it is not linked to a case. Select the email to load its contents in the right-hand pane and there will be a button that says attach to case.
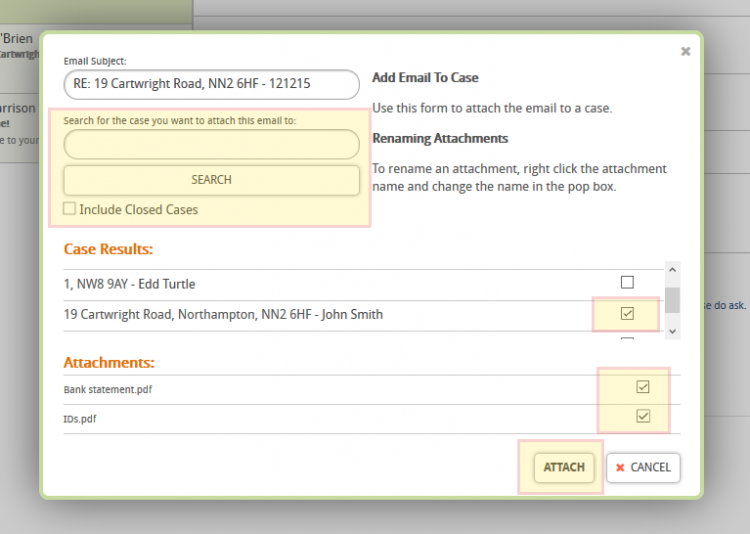
Clicking attach to case will load up a window with all the options needed to attach that email to a case. Use the search box to find the case you wish to attach the email to. The case results will list all the potential cases to attach the email to, simply tick the case you want to attach the email to. Tick any of the document attachments that you want to be uploaded to the case as well (in this example we will include the bank statement and IDs) then click the attach button.
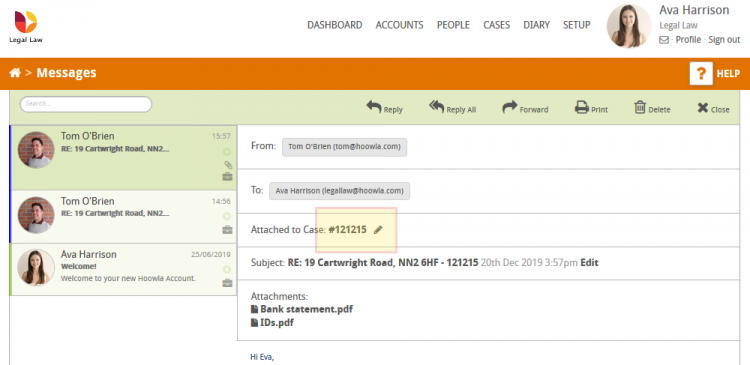
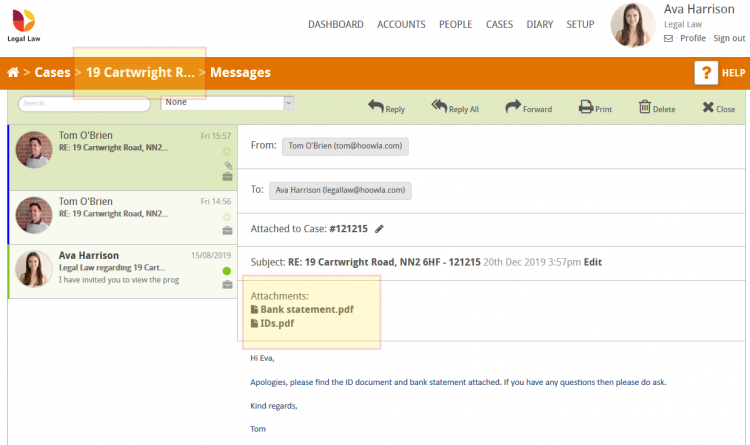
You will now see the attached to case section of the email shows us that it’s attached to a case by displaying the case id that the email is attached to. Lets now take a look at how to find the email in the case along with its attachments. Clicking on the case id in the email is a quick way to open up the case.
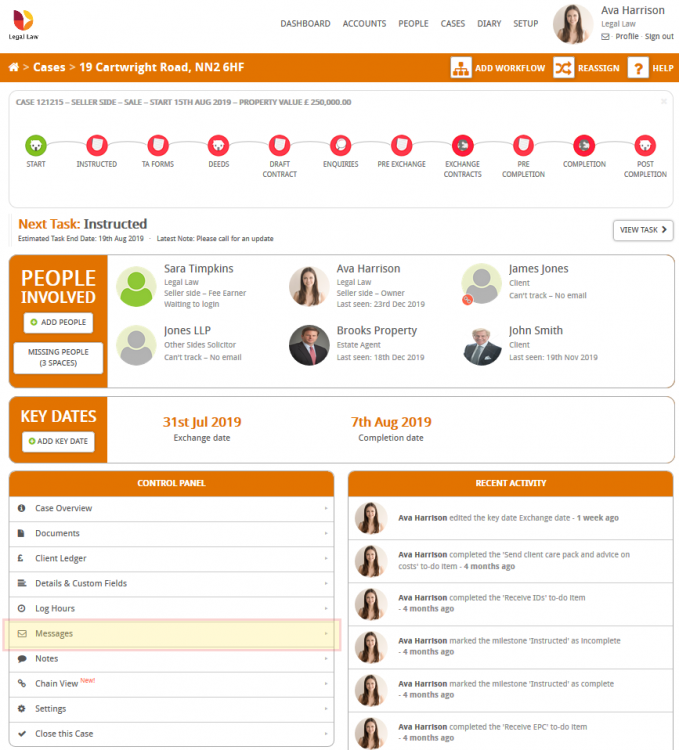
Once in the case, click on messages in the control panel to view all of the emails that have been both sent from and attached to the case.
Accessing message when you are in a case will only show you the emails that are attached to this case. You can tell that you are only viewing emails for this specific case as the bar at the top will display the case name. You can also access the attachments in the email by clicking on their names. You will find all of the attachments saved in the documents area of the case as well.
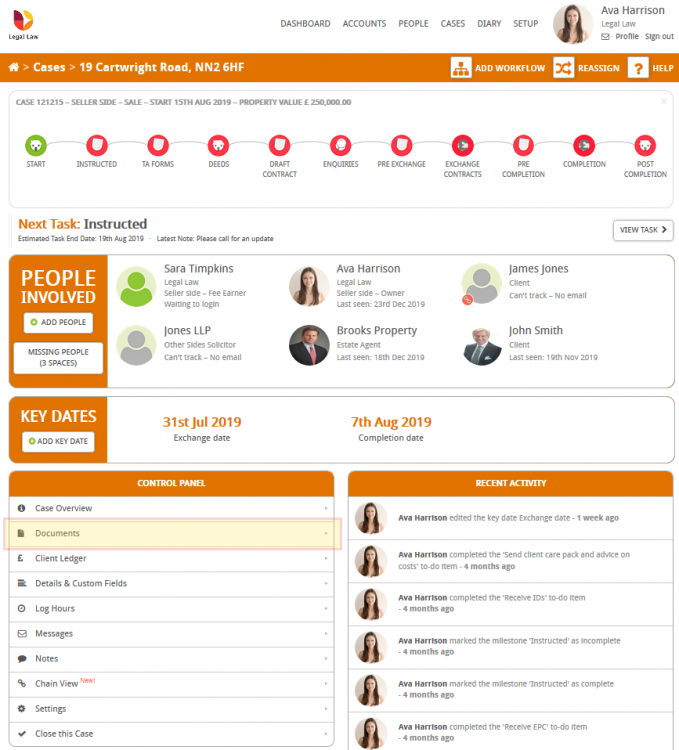
To view the attachments in your documents list click on documents in the control panel.
If you have grid view enabled in your document list view then you will find the attachments in the attachments folder.
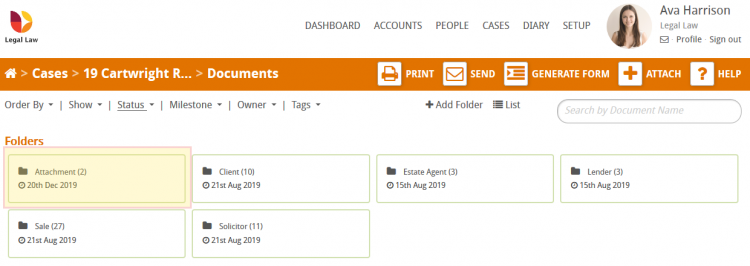
Clicking into the attachments folder will display all of the documents which were added to the case via an email attachment.
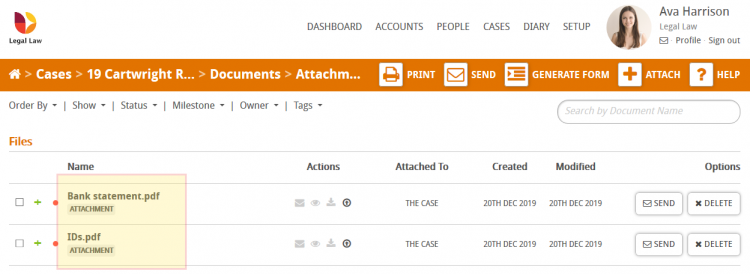
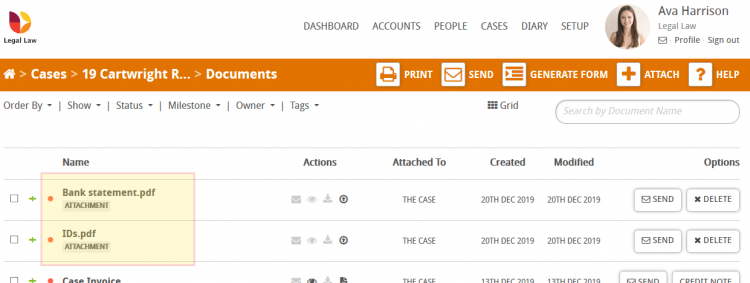
If you have list view enabled in your document list then the attachments will be displayed in the list of case documents with the tag attachment.