This guide will give you step by step instructions on how to generate an invoice within Hoowla.
How to generate an invoice in Hoowla
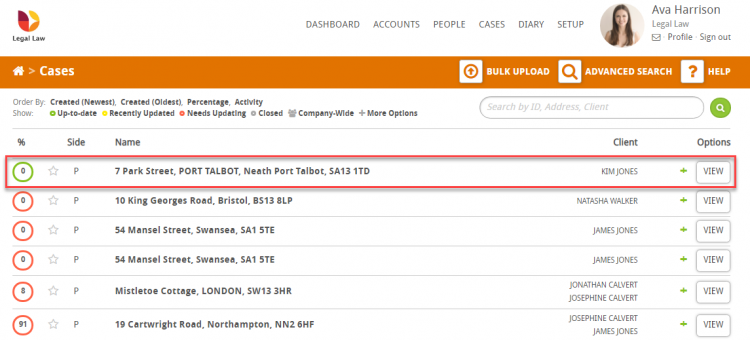
Click the Cases link next to your name.

Select the case by clicking on the case address or ‘View’ button
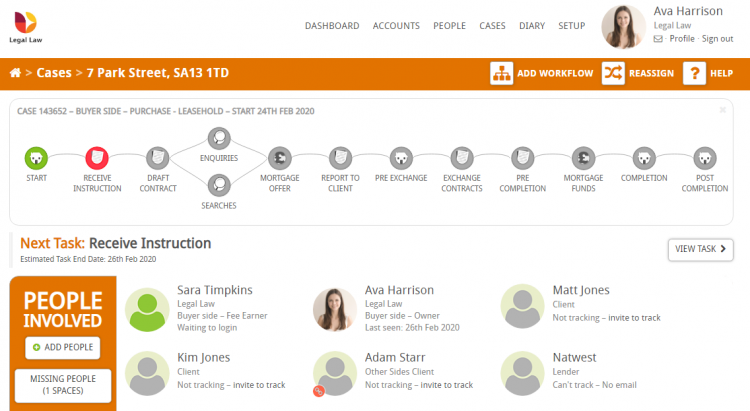
You are able to generate an invoice from any milestone within a workflow
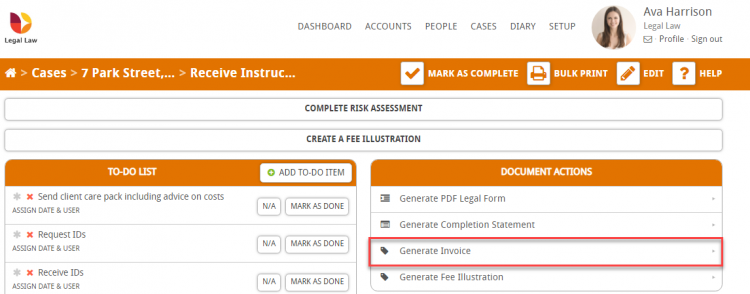
When in a milestone go to Document Actions and select Generate Invoice as indicated below:
You will then be presented with the following screen to Create an Invoice
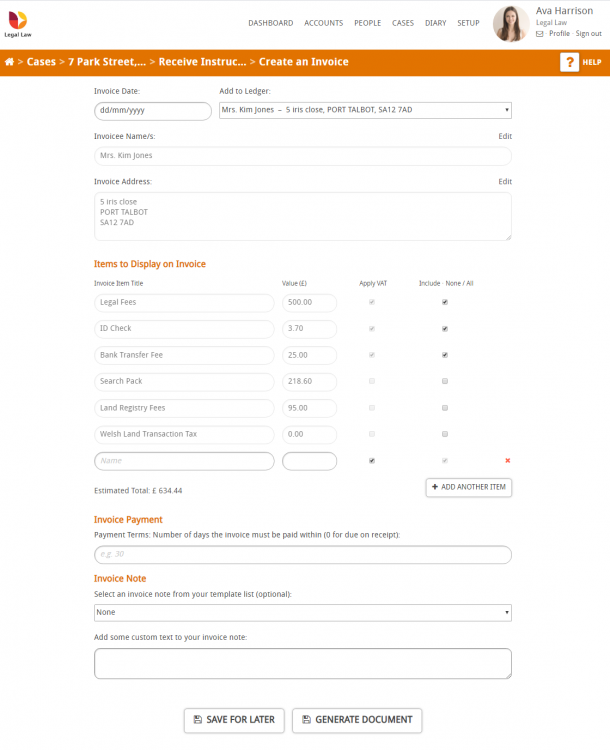
There are key areas of this form which we will discuss in detail below

- Invoice Date – enter the date of the invoice. Add to Ledger – Use the drop down to add the invoice to the correct ledger
- Invoicee Name/s: this is auto populated, but can be edited by using the edit button on the right of the field
- Invoice Address: this is auto populated, but can be edited by using the edit button on the right of the field
- Items to Display on Invoice: each row has 4 sections; Invoice Item Title, Value (£), Apply VAT tick box and Include – None/ All tick box
- Estimate Total this is auto generated from the figures in the rows above. Should you need to add additional fees there is a button to Add Another Item.
- Invoice Payment – Number of days the invoice must be paid within (0 for due on receipt):
- Invoice Note – use the drop down to select an invoice note from your template list or use the text box below to add custom text to the invoice
If you want to add additional items at the bottom of the ‘Items to Display on Invoice’ list is an empty text box. Add your new item, value and select whether you want to apply VAT.
If you need to add more than one item click the +Add Another Item box to bring up additional box/es.
Note: If you are adding an item that is likely to be used often please see this guide on adding new invoice items: How to Set Up Invoice Categories and Items.

You then have the option to Save for Later or Generate document.
If you choose to generate the document you will be presented with the following screen. A green notification bar will display across the screen to inform you that the invoice has been generated successfully.
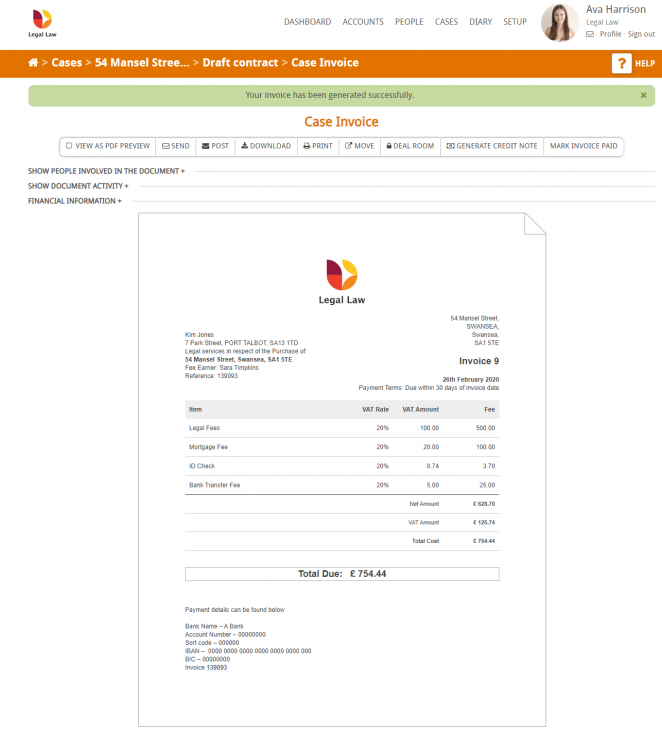
There are several helpful things you can do on this page including:
- Send – attach the invoice to an email and send it though Hoowla
- Download – download a PDF version of the invoice
- Move – move the document to a designated area with the workflow
- Generate credit Note – should there be an error on the invoice you are able to generate a credit note for the client
- Mark invoice Paid – you are able to enter the date that the invoice was paid
You will note that your bank details display at the bottom of the invoice. To set these read our guide on Adding a Footer to your Invoices