This guide will look at the reconciliation area within Hoowla and explain how to reconcile your accounts.
How to Reconcile Client and Office Accounts
Click the Accounts link next to your name.

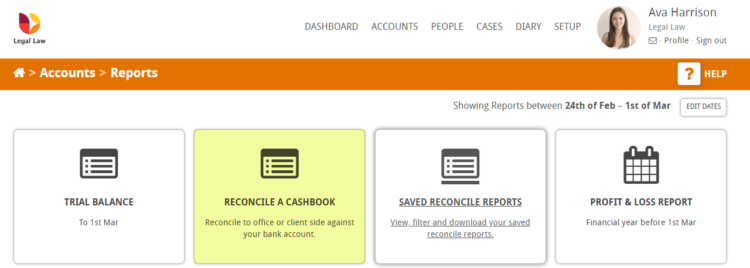
Click on Reports in the navigation bar.

Click the Reconcile a Cashbook button.
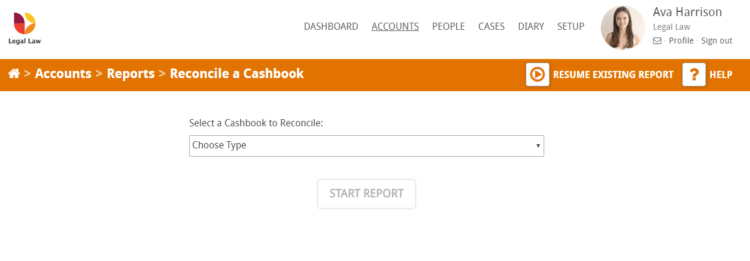
You will then be presented with the following screen. Use the drop down to select which cashbook you wish to reconcile.
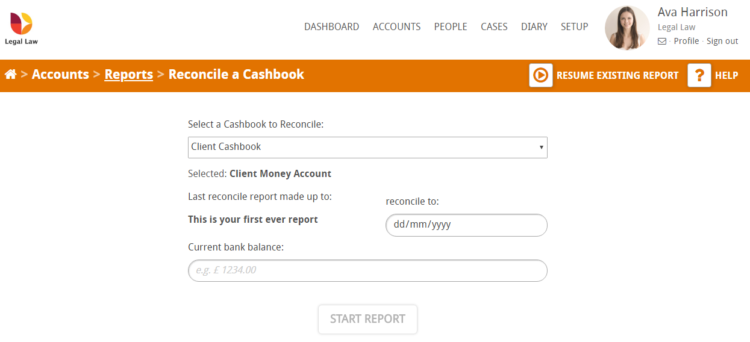
The screen will expand and give you additional fields, as shown below. You will need to select the date you wish to reconcile to and enter the current bank balance for the chosen cashbook.
When you are happy with the data you have entered press the Start Report button.
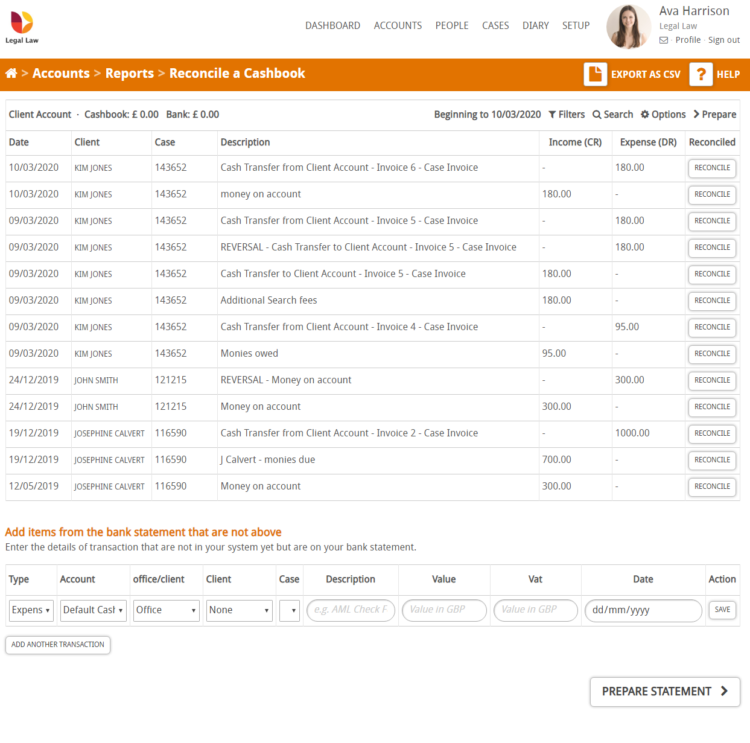
You will then be presented with the following screen which shows all the transactions that are new or reconciled in the date range of your reconciliation. Items that are yet to be reconciled with have a Reconcile button at the end of the row.
There are also a number of features to help you search though your reconciliation report. Below we will look at these features in more detail.
In the highlighted section below you will see the name of the bank account you are reconciling, then the amount of the cashbook and the amount of the bank (this is the information you entered on the previous screen)

On the right you will see the date range of the reconciliation. If this is your first reconciliation it will not have a start from date. In future reconciliations the start date will show and will be one day from the last reconciliation date.

There are a number of options to help you find and reconcile transactions.
1. Filters
When you click on the Filter button a new row will appear (highlighted below) giving you options to filter your reconciliation list.
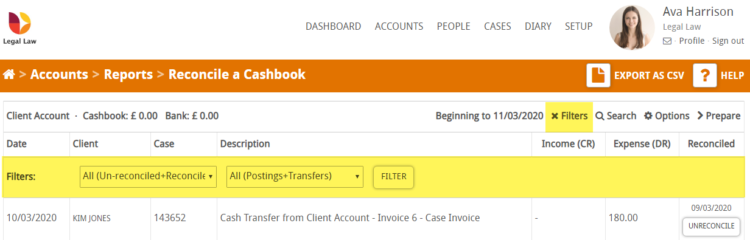
In the first drop down you have the option to select to filter by:
- All (Un-reconciled + Reconciled)
- Un-reconciled
- Reconciled
In the second drop down you can select:
- All (Postings + Transfers)
- Postings Only
- Cash Transfers Only
When you are happy with your selection press the Filter button and your list will be modified to reflect your filter choices.
2. Search
Clicking the search button will bring up a new row will appear with three search boxes (highlighted below).
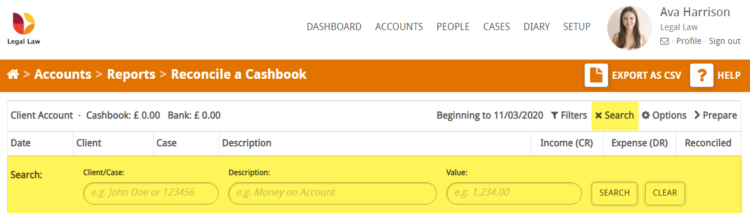
The search function gives you the option to search by-
- Client or Case (e.g a client name or case ID)
- Description of the transaction e.g. Client money
- Value of the transaction
When you are happy with your selection press the Search button and your list will be modified to reflect your filter choices.
3. Options
When you click on the Options button a new row will appear (highlighted below)
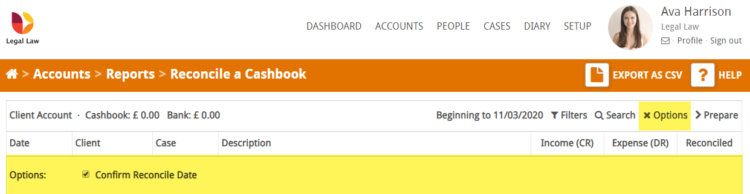
This provides you with a tick box to decide if you wish your reconciliation list to confirm the reconcile date or not. This is useful if you do daily reconciliations.
In Hoowla you should always record the date the transaction appeared in the bank statement when pressing reconcile. If you do daily reconciliation by unticking this it saves you entering today’s date constantly as you go through the transactions. Do not use this option if you are reconciling more than one day.
4. Prepare
The Prepare button is the same as the Prepare Statement button at the bottom of the screen. When pressed it will generate a draft Bank Reconciliation Statement.

The next part of the reconcile page is the list of items that need to be reconciled. In the highlighted row below you can see that each row has the following data
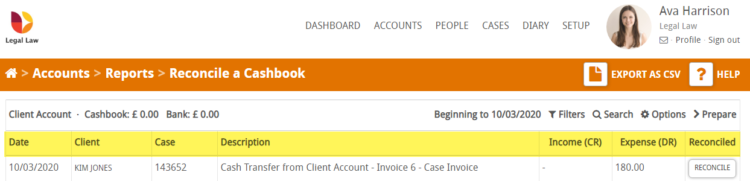
- Date – the date of the transaction in Hoowla
- Client – the name of the client
- Case – the Hoowla case number
- Description – the description of the transaction
- Income (CR) – If the amount is an income (credit onto the account) it will display in this column
- Expense (DR) – If the amount is an Expense (debit from the account) it will display in this column
- Reconcile – this is the button you will press if you feel the entry correctly matches your bank statement (we will discuss this further later on)
The last section on the reconciliation page we need to cover is the ‘Add items from the bank statement that are not above’ table which is at the bottom of the page (as shown below).
This section can be used to enter the details of a transaction that is not on the system yet but is on your bank statement.

Now we understand the layout of the reconciliation area lets look at the procedure for reconciling in Hoowla.
How to reconcile in Hoowla
The best way to address reconciliation is row by row, using your bank statement against what is stored on Hoowla.
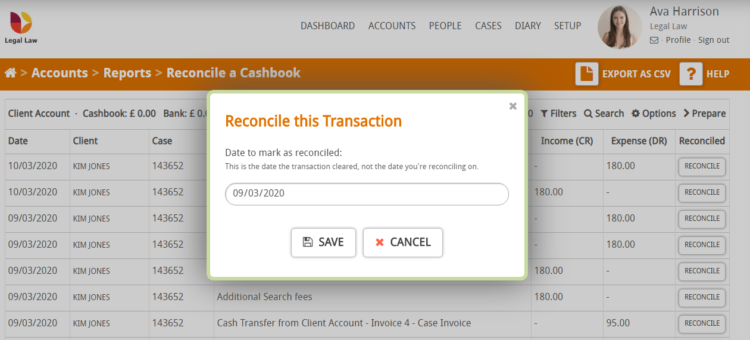
If you feel the information in a row clearly matches the information in your bank statement press the Reconcile button at the end of the row.
A pop up will then show on the screen asking you to select the date to mark the transaction as reconciled
Important note: the date you enter should be the transaction date on the bank statement, not the date you’re reconciling on. For example, if the money cleared on the 3rd March and you’re reconciling on the 6th March, you select the 3rd.
When you are happy press the Save button.
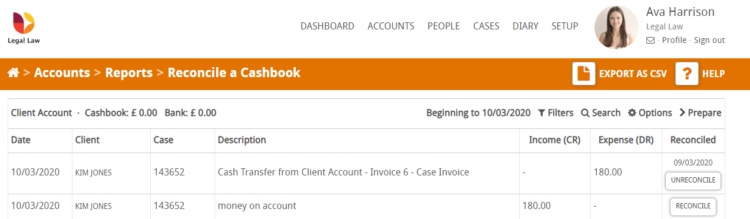
This will then mark this row as Reconciled as you can see from the image below
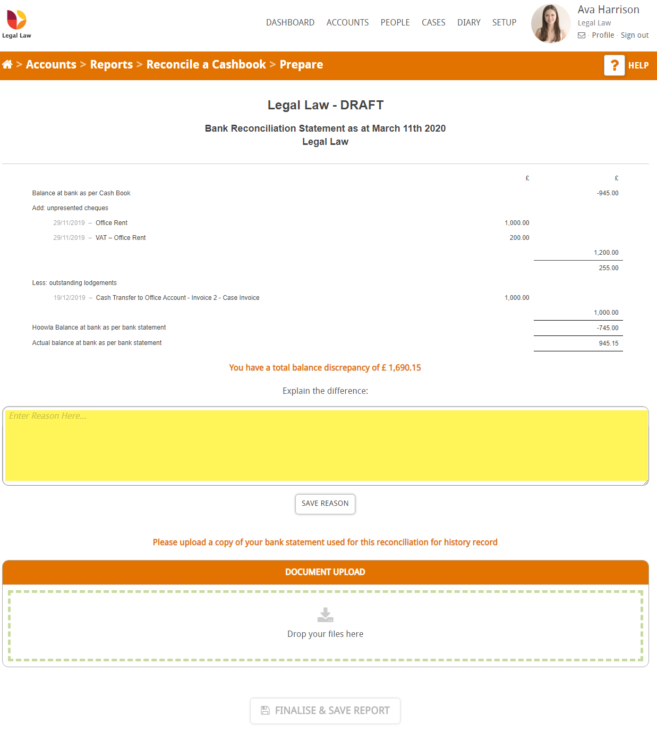
When you are happy you have reconciled all the bank transactions click the ‘Prepare statement’ button at the bottom of the page. This will generate a draft Bank Reconciliation Statement, as can be seen below.
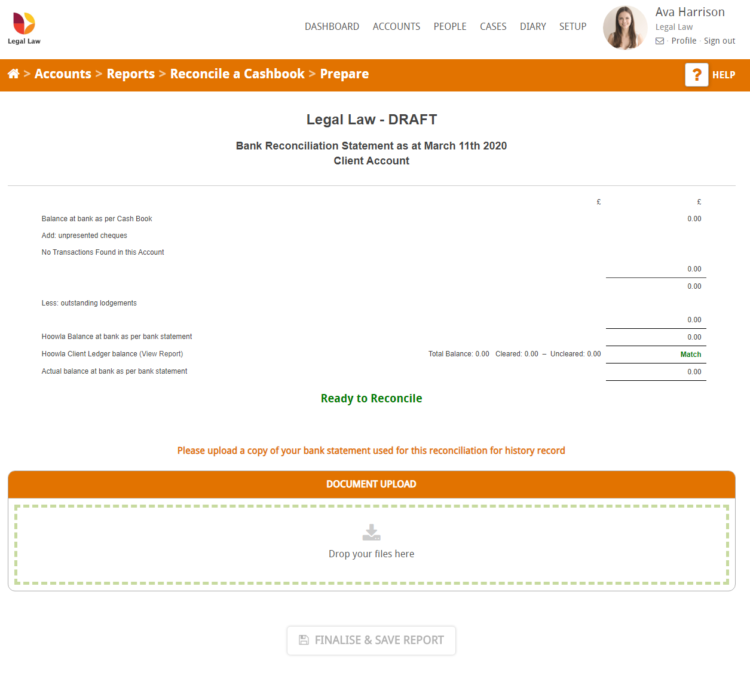
If the reconciliation doesn’t match an additional box will be presented (as can be seen below) asking you to explain the difference. You will need to submit a reason for the discrepancy and press the Save Reason button.
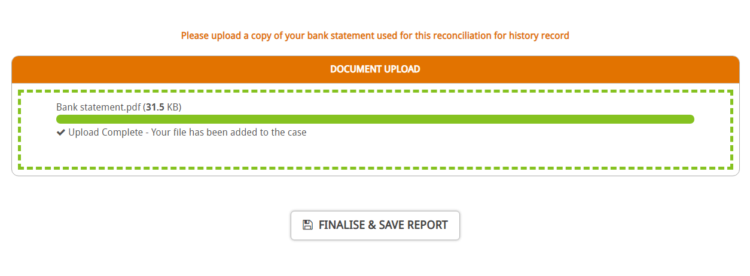
You will need to upload a copy of your bank statement. You can drag and drop this into the Document Upload box or click to select the correct statement from your computer. Once the statement has been uploaded the Finalise & Save Report button will become clickable.
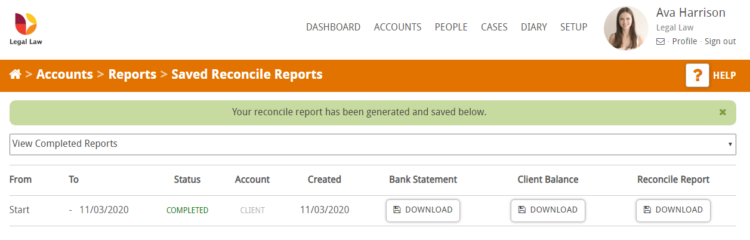
Clicking the Finalise & Save Report button will save the data and take you to Saved Reconcile Reports page. A green success notification bar will be displayed noting that your report has been generated and saved.
On this page you will be able to see a history of previous reconciled reports and download them if required.