This guide will show you how to set up the link between your Stripe account and your Hoowla account.
Once the link is established you will be able to;
- take deposits, when a client instructs, and
- allow clients to pay invoices
Before you start this guide, you should have
- your Stripe Public Key
- your Stripe Private Key
For help on how to find these keys, visit the Stripe support site, who have helpful guides.
HOW TO SETUP STRIPE
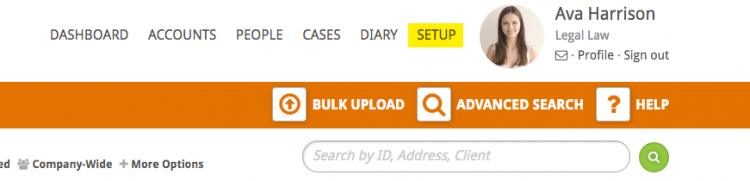
Click on Setup
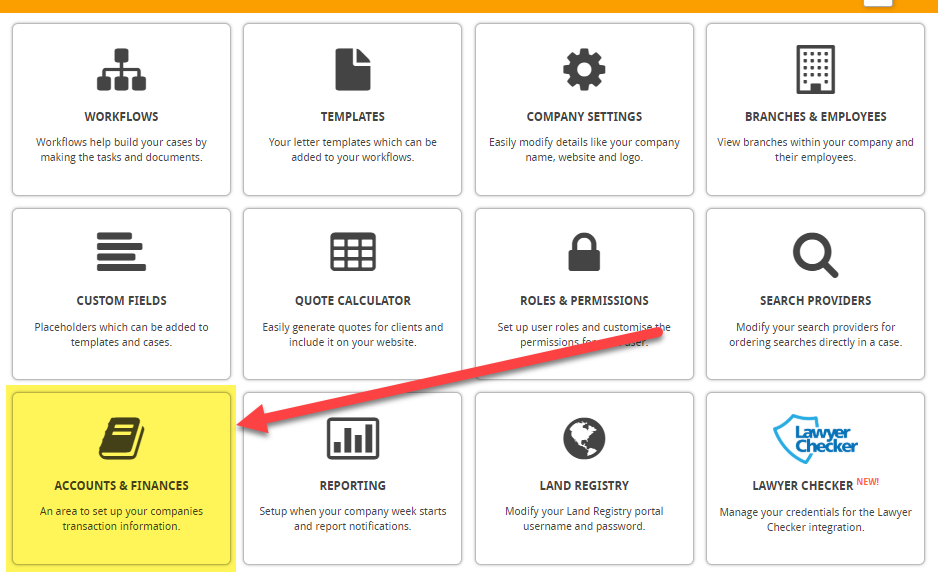
Then click Accounts & Finances
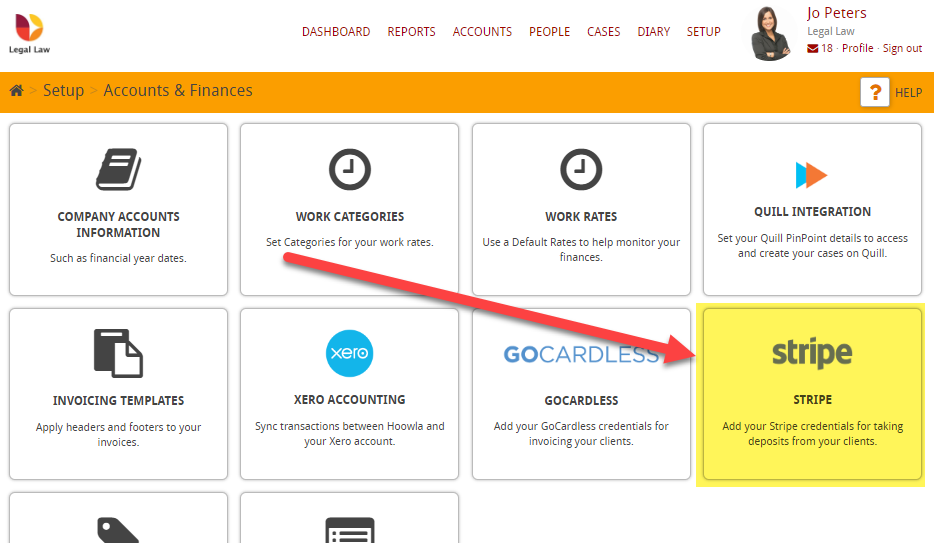
then click on Stripe
Then enter your Public App key and Private App key into the boxes (these keys will be available in your Stripe account):
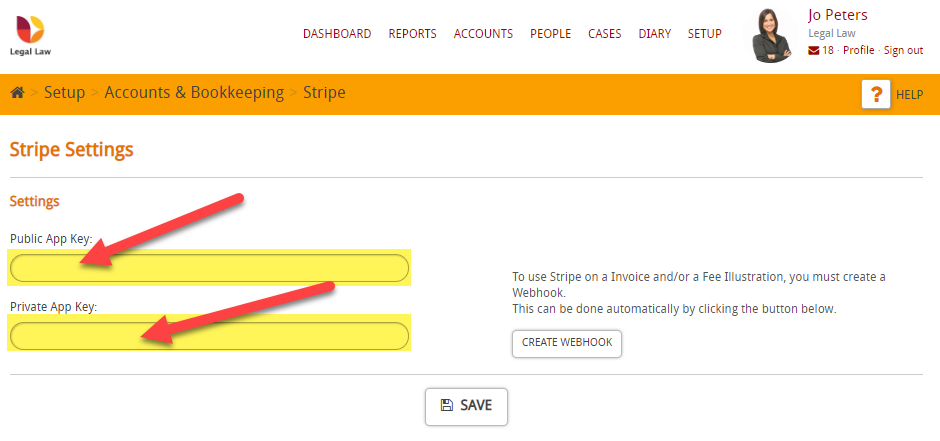
Then press Save
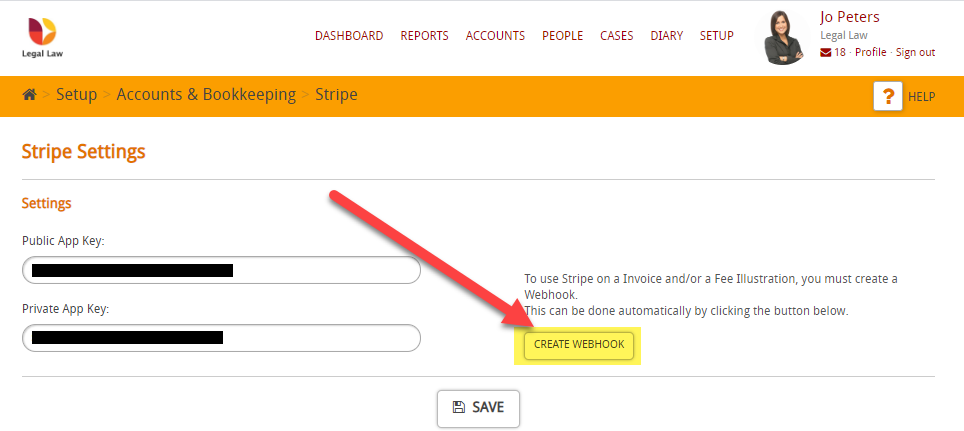
Finally, you will need to create a webhook, which will allow the system to place Stripe buttons on your invoices so that your clients can pay online.
Click on Create Webhook
Then this screen should appear
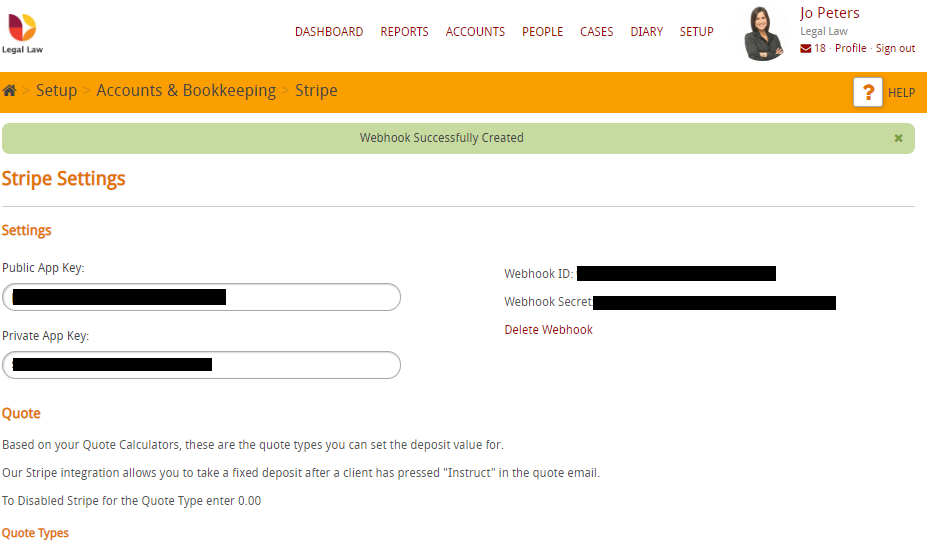
The integration with Stripe gives you three options, you can have the ‘Pay with Stripe’ button appear:
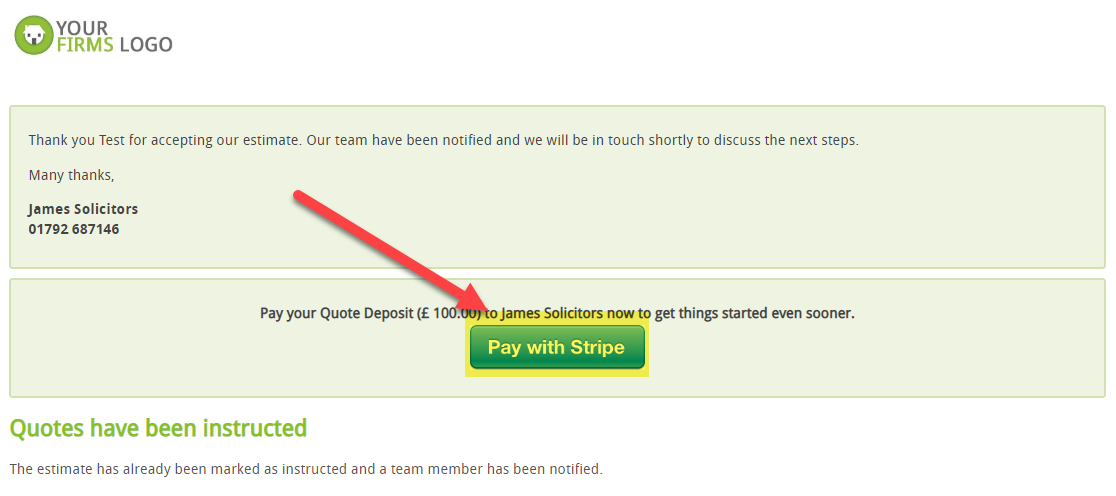
- ON THE INSTRUCTION WEBPAGE i.e.when the client instructs then they get presented with a Pay with Stripe button:
2) ON THE INVOICE i.e. when they receive an invoice the ‘Pay with Stripe’ button appears at the bottom of the email:
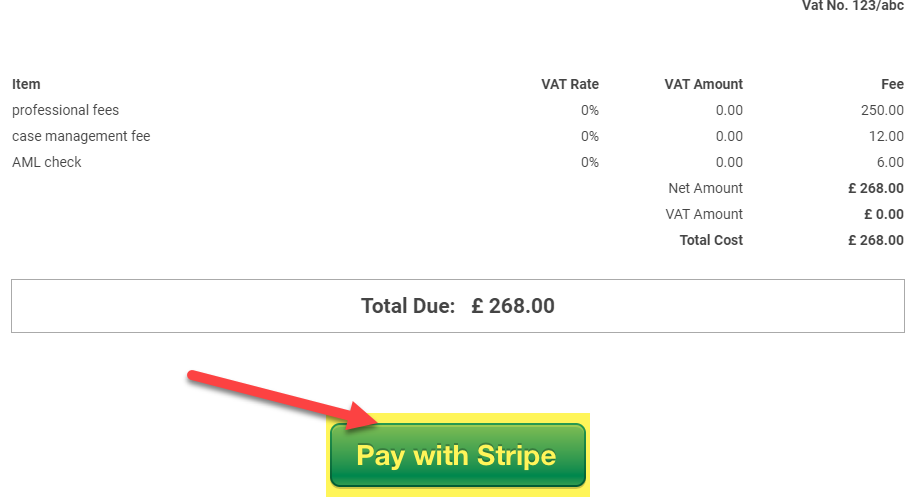
3) You can have the button display on both the instruction webpage and the invoice.
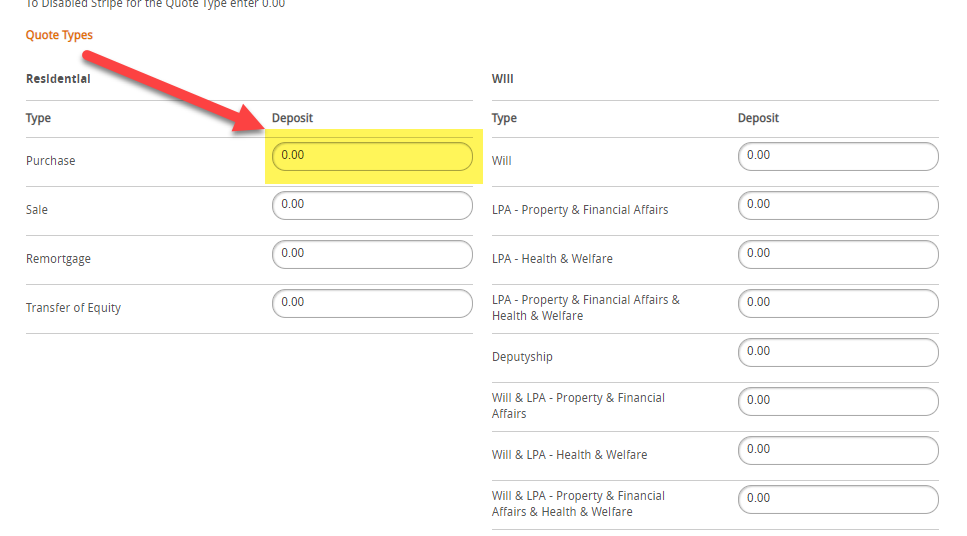
NOTE: If you want the button to only appear on Invoices and not on quotes then leave the deposit amounts at 0 and the button will only appear on invoices.
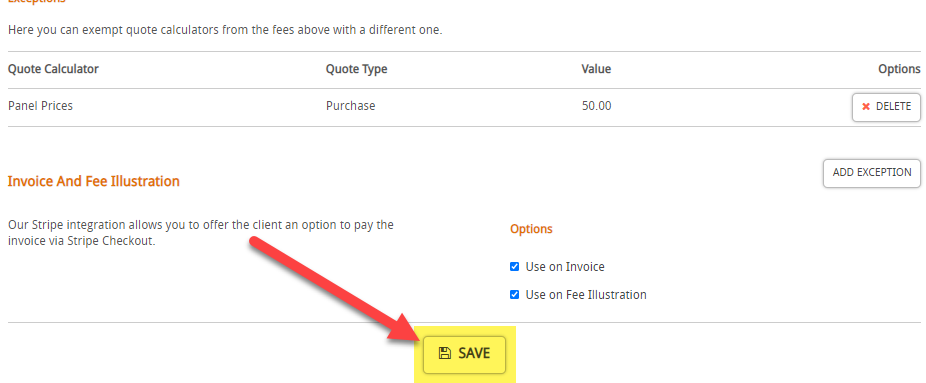
Now let’s look at how you set your deposit amounts, scroll down and enter the amount of deposit that you want to take for each Quote Type:
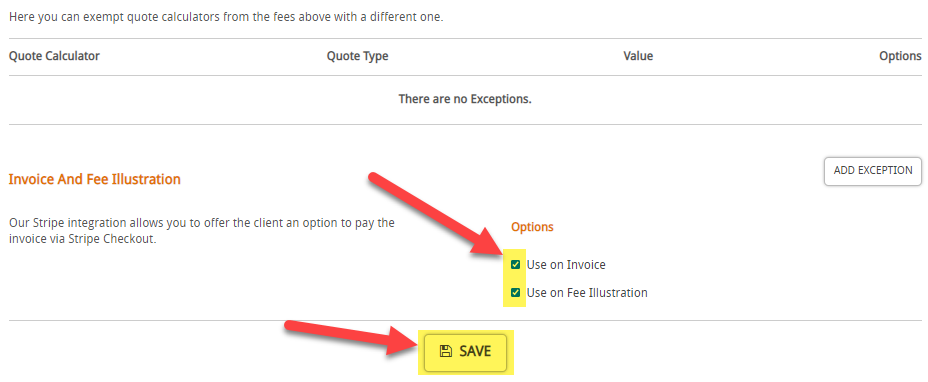
Once you have filled in the amounts, scroll down to see two options, Use on Invoice and Use on Fee Illustration, choose which you’d like to activate then press Save
To finish off this guide, we will look at how to set up an exception, scroll down and click Add Exception
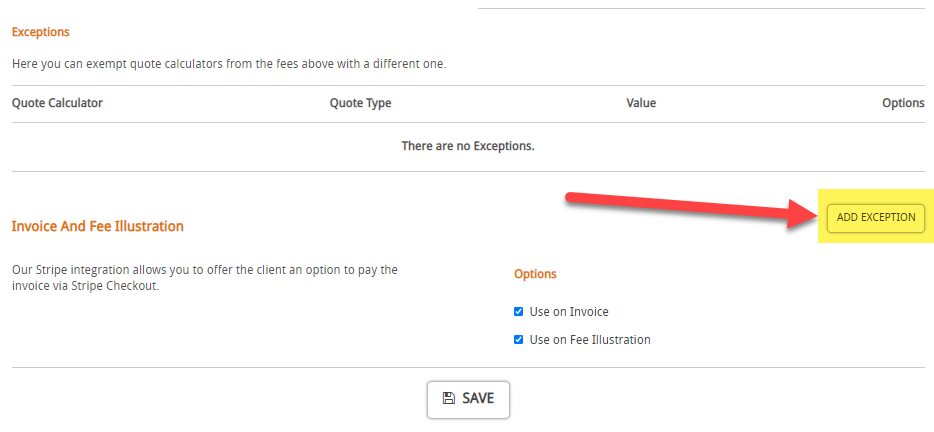
Choose the calculator that you would to make an exception for, in this example, I will select ‘Panel Prices’, Purchase and £50
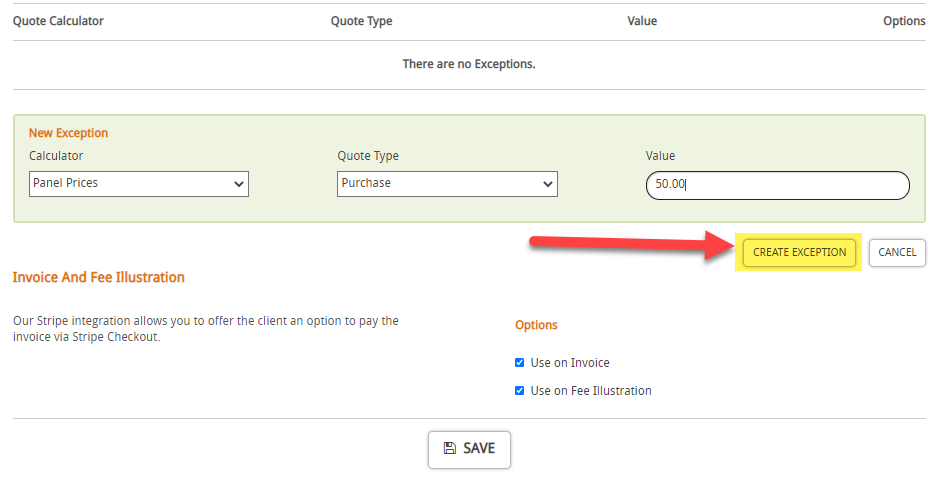
You will then see the table update with your exception then finally click Save