This guide looks at how to post a transaction to your Hoowla office accounts, e.g. this month’s rent, or an electricity bill.
Click the link below to view the specific action:
Click the Accounts link next to your name.

Recording Outgoings
Click the Record Outgoing button under the main navigation.
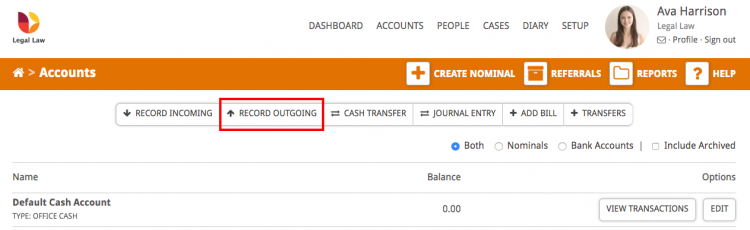
Note: On this screen you can post one outgoing transaction. If you want to bulk post a number of transactions there is a link called Switch to Bulk Input in the main navigation bar.

Single transaction
Important: Make sure to select the Office Money radio button.
- Select the Nominal to which to post the transaction.
- If you have multiple office bank accounts you can select which bank account this is for in the Cash Account drop down.
If you are unsure which bank account the money is coming out of you can tick the ‘Place in suspense account’ option to override the drop down and assign the transaction later. - Give the transaction a description; e.g. Office Rent or Electricity Bill
- Fill in the transaction value and any VAT associated with it.
The ‘Calculate based on value’ button works out the VAT based on the current standard VAT rate. - Finally, enter the transaction date.
You will not be able to select a date that is already been signed off in a reconciliation period. For instance, if you have saved a reconciliation report up until the end of August you would not be able to post before that date because it would invalidate your reconciliation report. - Once you are happy click the Save button and the transaction will be posted.

Bulk transaction
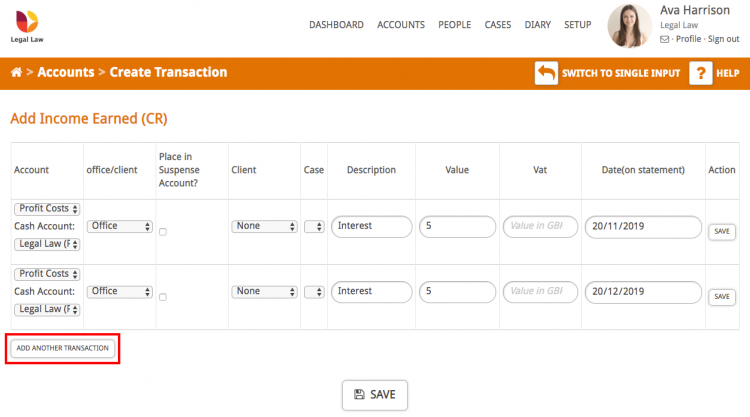
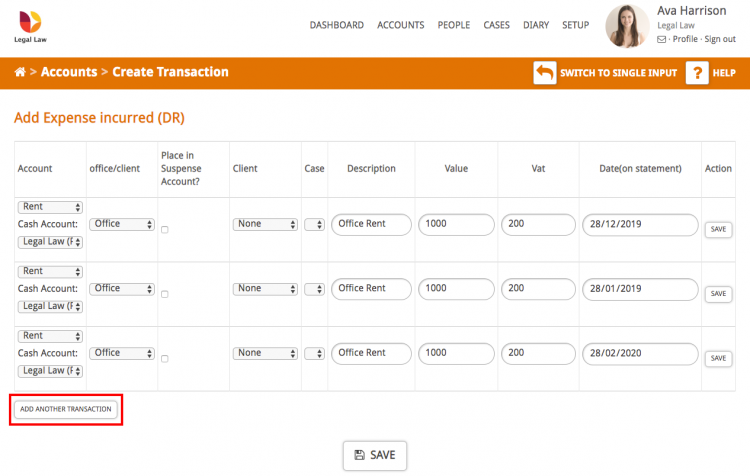
If you want to add more than one transaction at a time the bulk input allows you to add multiple transactions using the ‘Add another transaction’ button.
When adding transactions in bulk the inputs are the same as a single transaction, but displayed horizontally with each line a new posting.
You can save each transaction as you add it using the ‘Save’ button at the end of the line, or all at once using the ‘Save’ button at the bottom.
Recording Incomings
Click the Record Incoming button under the main navigation.

Note: On this screen you can post one incoming transaction. If you want to bulk post a number of transactions there is a link called Switch to Bulk Input in the main navigation bar.
Single transaction
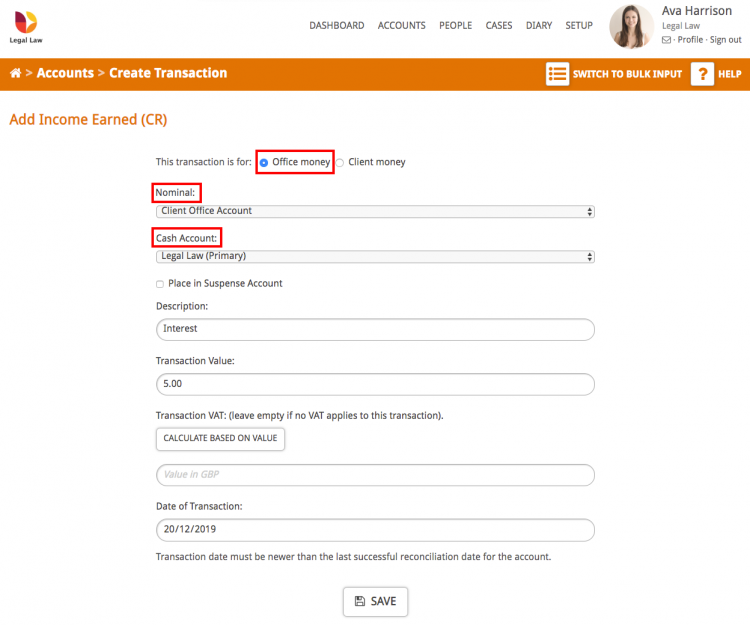
Important: Make sure to select the Office Money radio button.
- Select the Nominal to which to post the transaction.
- If you have multiple office bank account you can select which bank account this is for in the Cash Account drop down.
If you are unsure which bank account the money is coming out of you can tick the ‘Place in suspense account’ option to override the drop down and assign the transaction later. - Give the transaction a description; e.g. Interest, Unexpected Incoming Payment, Refund etc.
- Fill in the transaction value and any VAT associated with it.
The ‘Calculate based on value’ button works out the VAT based on the current standard VAT rate. - Finally, enter the transaction date.
You will not be able to select a date that is already been signed off in a reconciliation period. For instance, if you have saved a reconciliation report up until the end of August you would not be able to post before that date because it would invalidate your reconciliation report. - Once you are happy click Save button and the transaction will be posted.
Bulk transaction
If you want to add more than one transaction at a time the bulk input allows you to add multiple transactions using the ‘Add another transaction’ button.
When adding transactions in bulk the inputs are the same as a single transaction, but displayed horizontally with each line a new posting.
You can save each transaction as you add it using the ‘Save’ button at the end of the line, or all at once using the ‘Save’ button at the bottom.