This guide will look at how you can create and amend a custom field within Hoowla.
How to create a custom field
There are two ways you are able to create a custom field, in CUSTOM FIELDS or in TEMPLATES. The following guide will direct you to both areas and show you in detail how to create or amend a custom field.
Option 1. Create a custom field in the Custom Field area
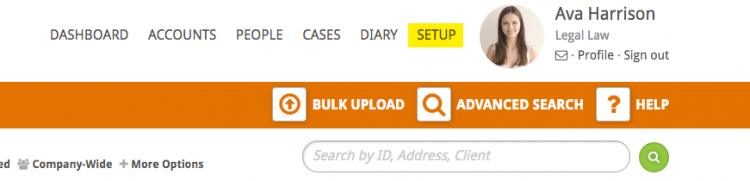
Click the Setup link next to your name.
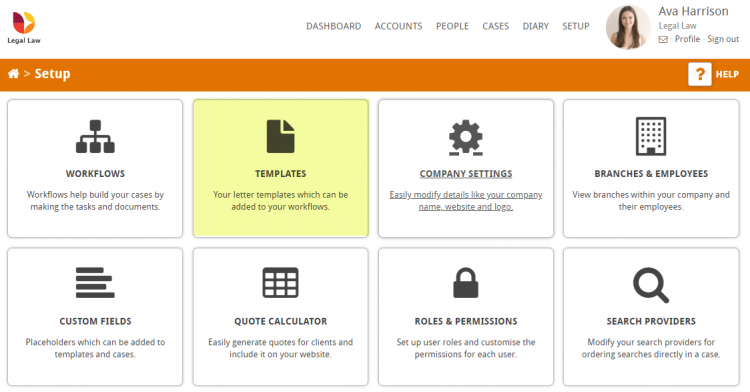
Select the Custom Fields box.

This will take you to the Custom Fields page and you would need to select Create Custom Field as indicated in the image below.
Please note: before creating a custom field it would be advisable that you search for the custom field you are thinking of creating to avoid duplicates.

Click here to jump to How to Create a Custom Field
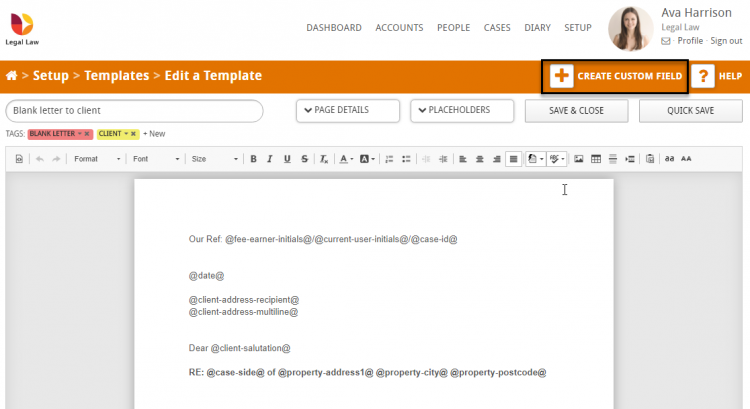
Option 2. Create a custom field in the Template area
The second option for creating a custom field is within the template itself.
Click the Setup link next to your name.
Select the Templates box.
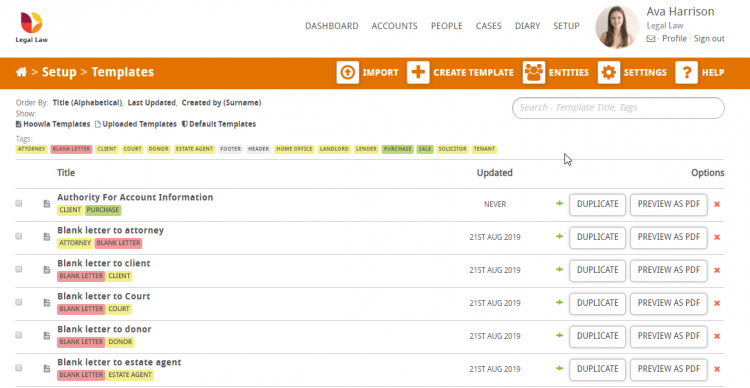
Select the document that you’re editing and want to create a custom field for. If necessary use the search box on the top right and then click on the template title.
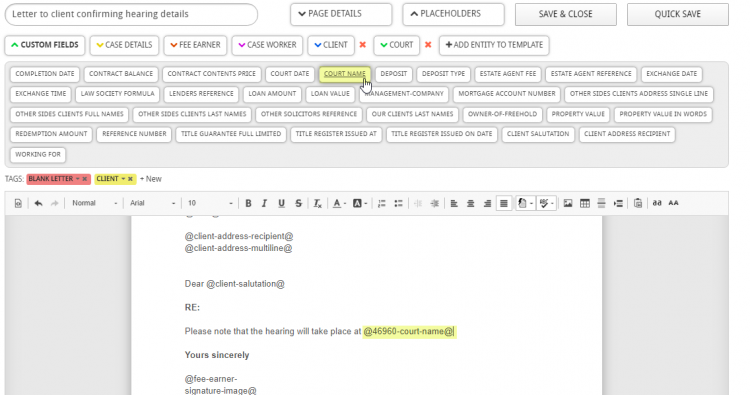
Once in the template you will notice a Create Custom Field button as can be seen below:
How to create a custom field.
Both routes will take you to the Create Custom Field form. Below we will go into each field in detail
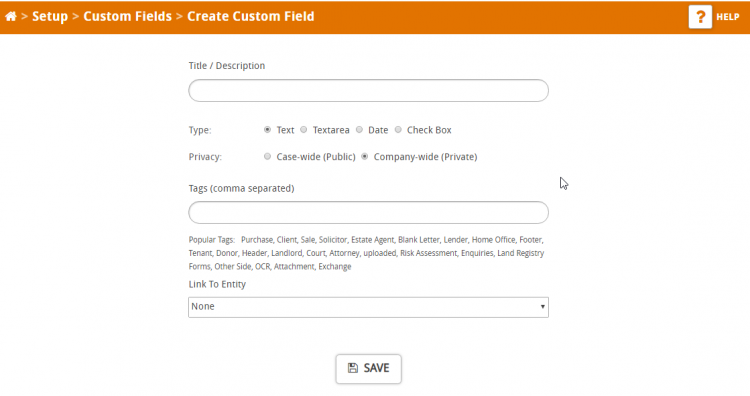
- Title / Description – this is the name that you wish the custom field to be called. It will also be used to generate the dynamic placeholder (if you are unsure what a dynamic placeholder is read our what is a custom field guide HERE).
- Type – select what type of custom field you require
- Text – a smaller area of text. Anything from one word to a short sentence (this is the default setting)
- Textarea – a larger area of text, such as a paragraph
- Date – this will give the option to select a date
- Checkbox – this will provide a tick box within the document
- Privacy
- Case wide (public) this would be used when creating a Key Date custom field that someone tracking the case could see
- Company-wide (private) (this is the default setting and should be used for the majority of custom field creations)
- Tags (comma separated) you have the option to manually enter a tag, or tags, separated by a comma. You can also choose from the list of popular tags below the text box.
- Links to Entity – in some cases you may wish for a custom field to be associated with a particular entity (for example if you were creating a field for an Estate Agent you would want it linked to the Estate Agents entity.)
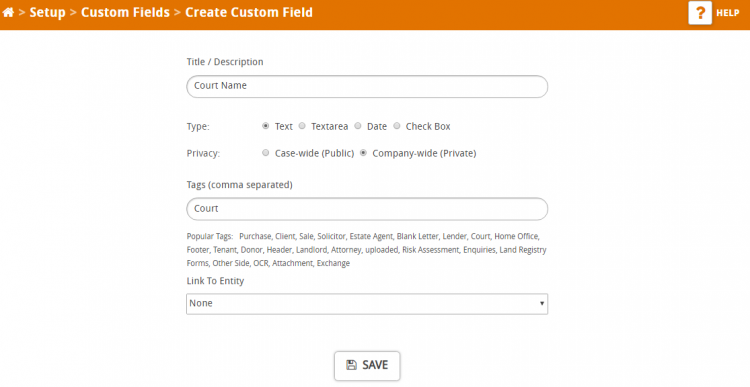
Below you will find an example of a completed form:
When you are happy press the Save button. You will be taken to the Custom Fields page and a green bar will be displayed confirming the changes. The new custom field will be visible in the custom fields list as can be seen below
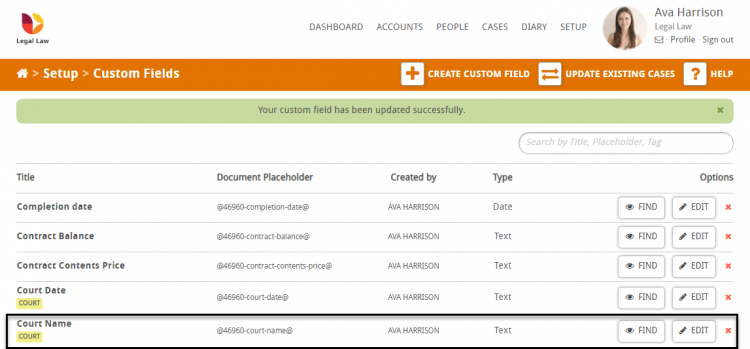
This custom field will now be available to use within a template. Clicking on the custom field will add the dynamic placeholder into the document.