How to Manually Log Hours to a Case
Click the Cases link next to your name.

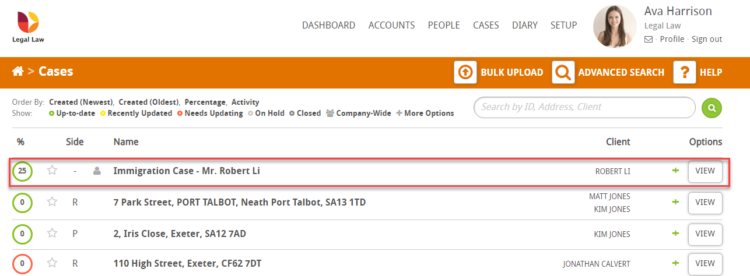
Select the case you wish to work on
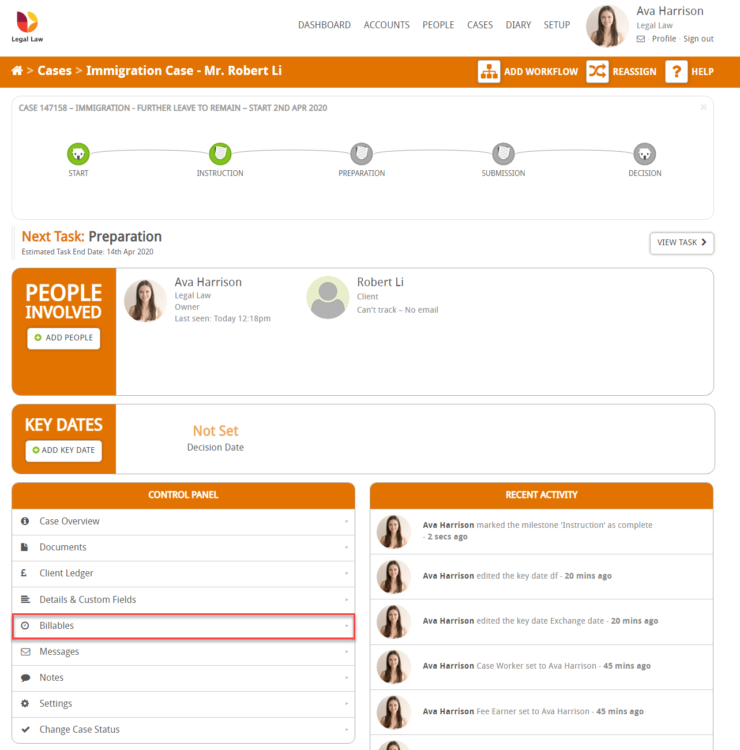
When inside the case click on Billables found in the control panel section.
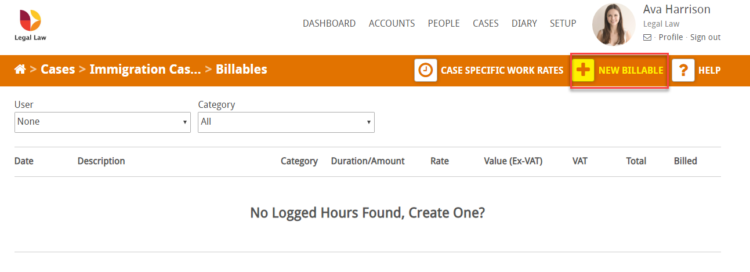
You will then be directed to the Billables page, click on the New billable button
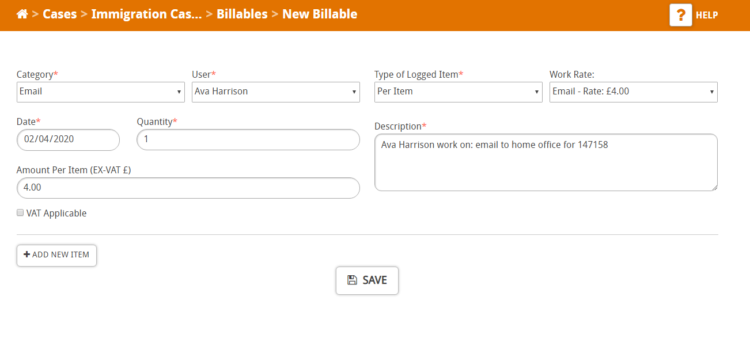
This will then take you to the New Billable page where you will be asked to record the details of the task
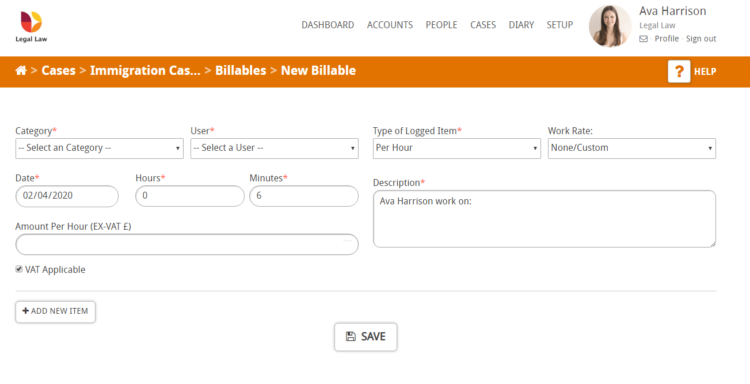
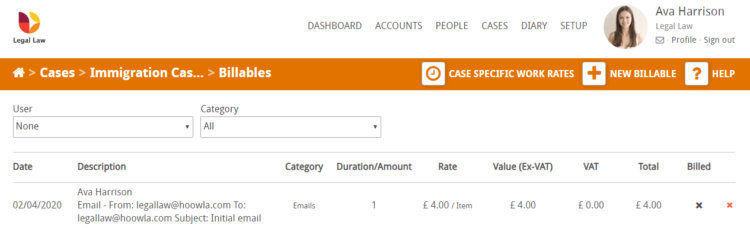
All field marks with * are mandatory. An example of a fully completed entry is as follows:
When you are happy with the content of the page press Save.
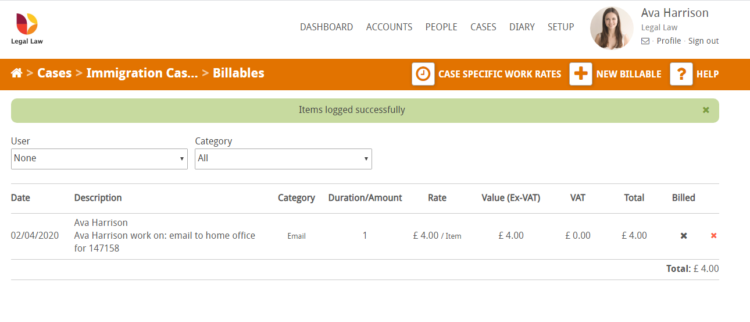
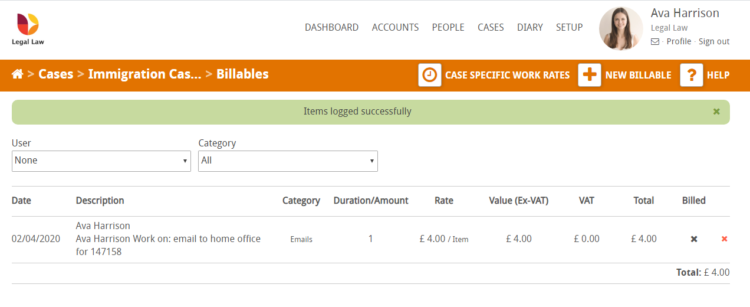
You will then be directed back to the Billables page on the case where the item has been logged successfully.
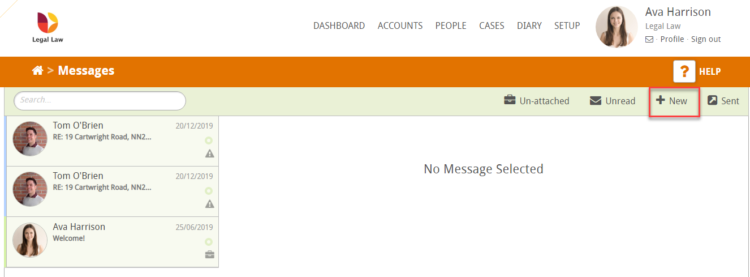
How to Log Time in the Message Centre
Click on the envelope under your name to enter the message centre

Select +New to generate a new email
You will see a Create Billable? with a tick box.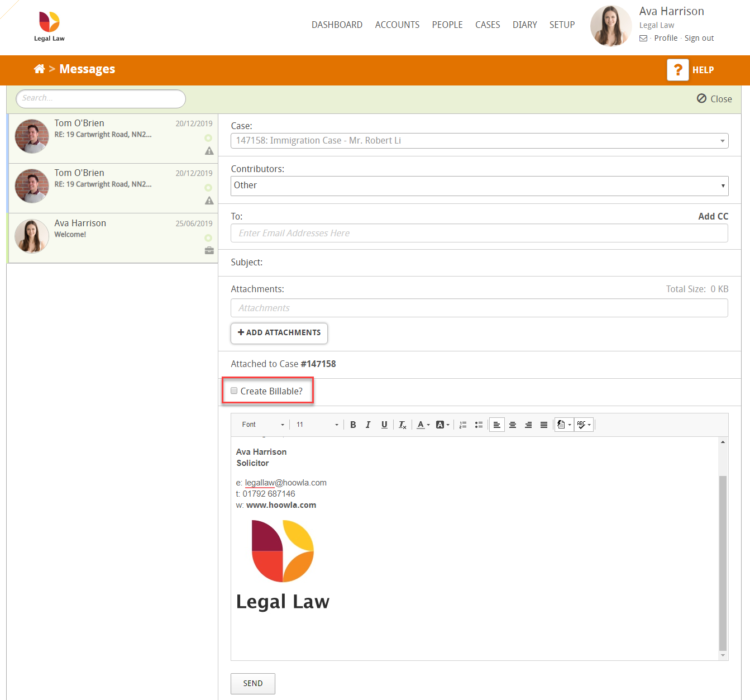
When you place a tick in the box, you will see that a new section appears;

Select a rate and user

As soon as you send the email, the new billable will be automatically added to your Billable items on that case.
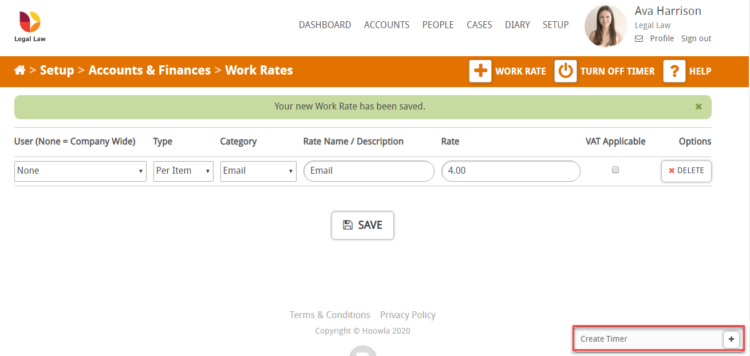
How to Log Time using the Hoowla Timer
The Hoowla Timer is visible at the bottom right of your screen.
Note: If the timer button is missing then follow this guide to learn how to add it.
Click on the button +
![]()
More options will appear:
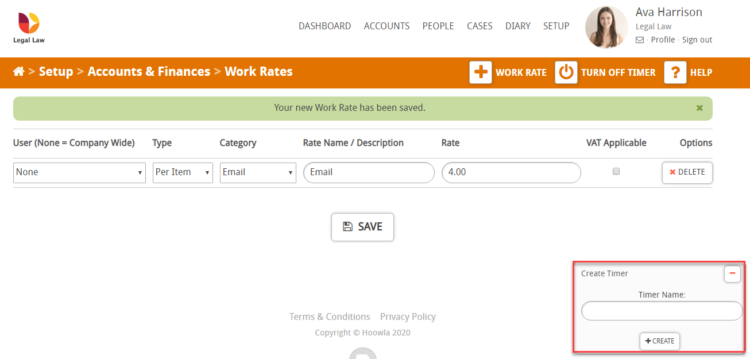
For the purpose of this example we will call the timer ‘Home office’ email. Click +Create and you will see that the format of the box will change as can be seen below
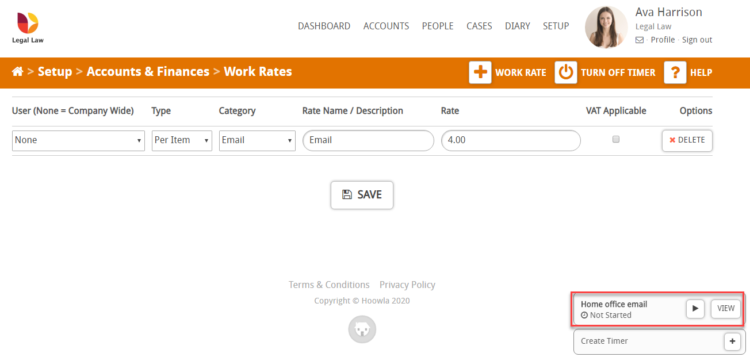
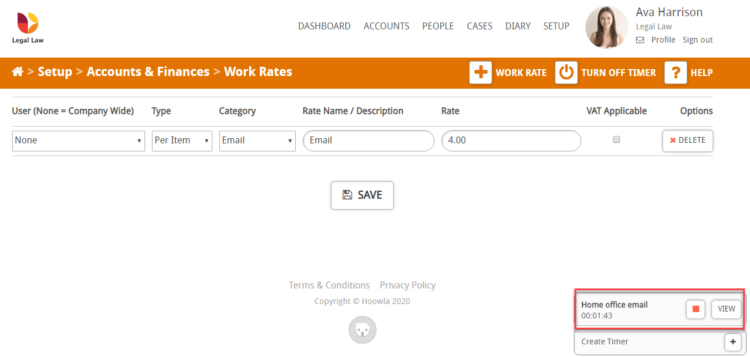
By pressing the play icon the timer will start counting. To stop the timer you simply have to press the red stop button.
When you have finished your task press stop and the message in the box will read Waiting for Allocation
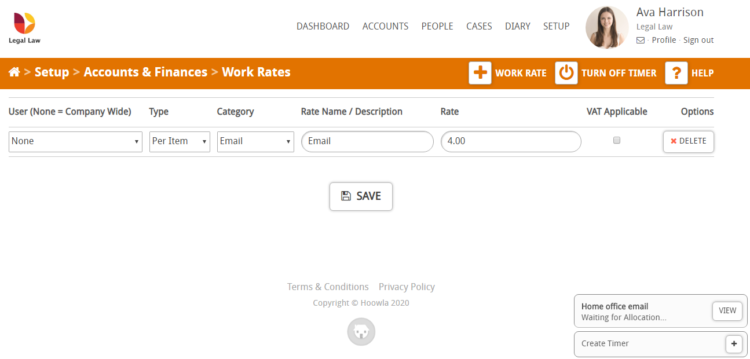
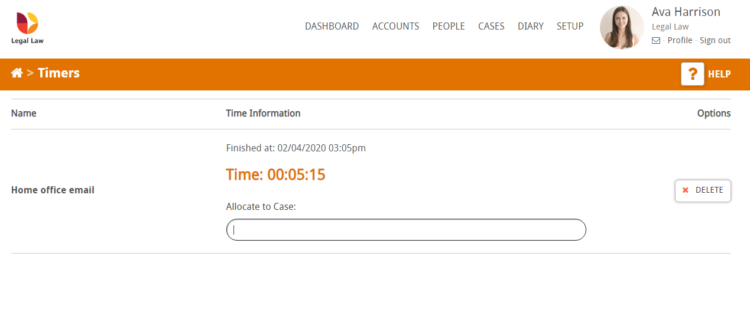
The next step is to press the View button that will take you to the Timers page.
From this screen, you can then allocate the task to a case by using the text field to search for a relevant case.
Note: You are can search a case number or client name
This will then take you to the New billable page where you can add further details of the task
In line with the example set out in this guide a completed example can be seen below
As indicated with a * the following fields are mandatory
- Category
- User
- Type of logged item
- Date
- Quantity
- Description
When you are happy with the content of the page press Save. You will then be directed to the Billables page for the case.