Setting a Document as an Email Template and Sending It Out
This guide will demonstrate how to set a document as an email template and how to send it out through your case.
You will need to have an existing template to do this.
How to set a document as an email template
Please note, you will need to have Branch Manager permission level or higher to do this step.
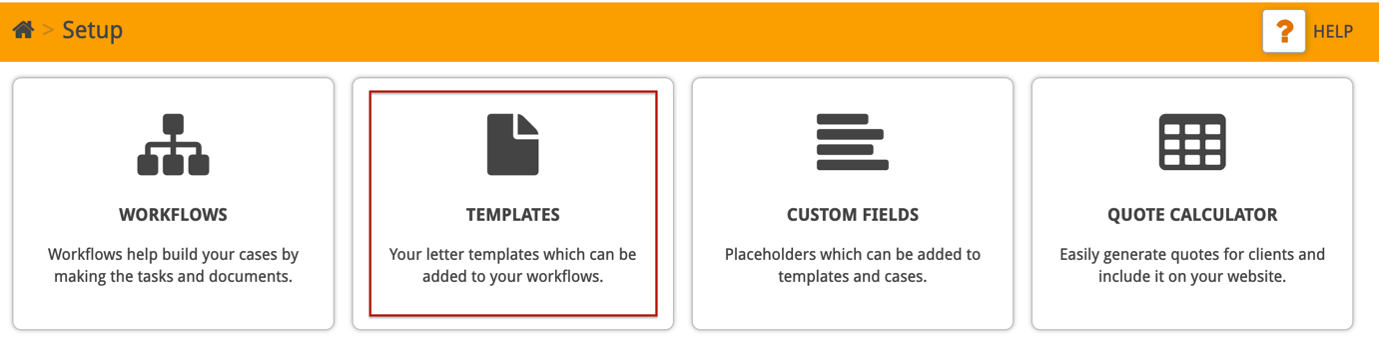
Firstly, click Setup.

Next, click Templates.
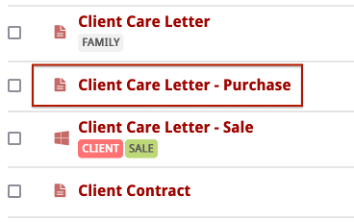
Look through your list of existing templates to find the document you are looking for, and then click on the title to open the template.
You can also use the document title to search for the template.
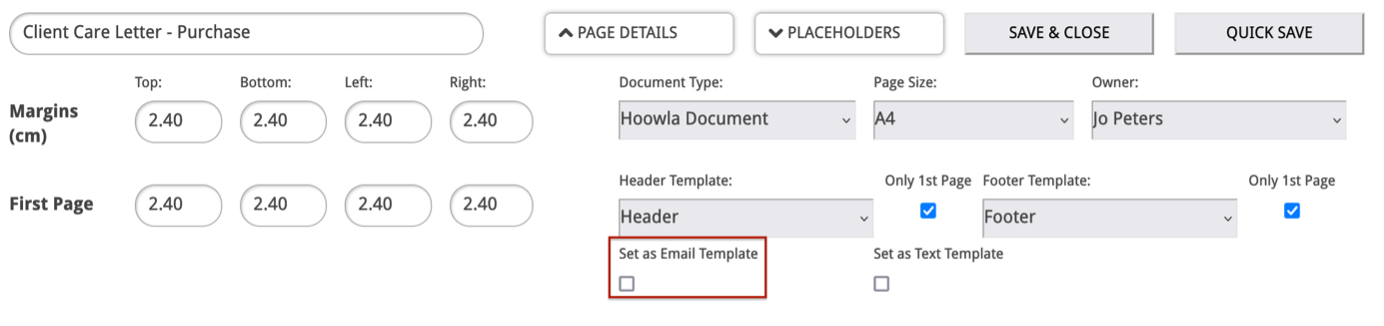
At the top of the template screen, click ‘Page Details’.

This will open additional details about your template page.
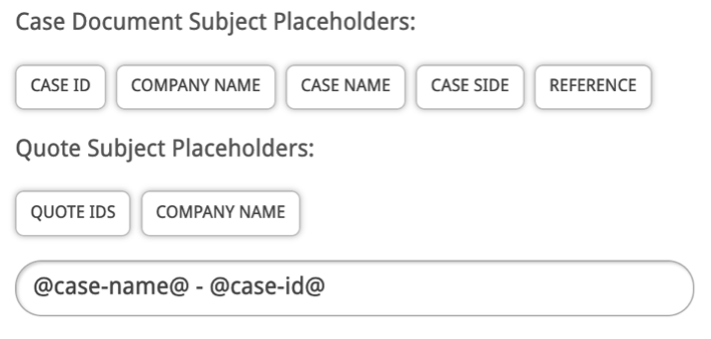
Tick the checkbox under ‘Set as Email Template’.
This will allow you to create an email subject by clicking on the buttons shown below.
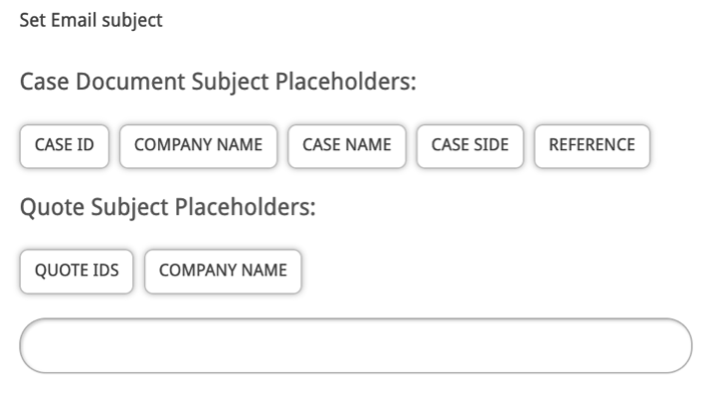
In this example we will use the Case Name, followed by the Case ID.
Once you are happy with the subject line, click Save & Close.

How to email your template
Firstly, click Cases to view your case list.

Find the case you want to send the email on or use the search box at the top.
Click the case name to access the case.

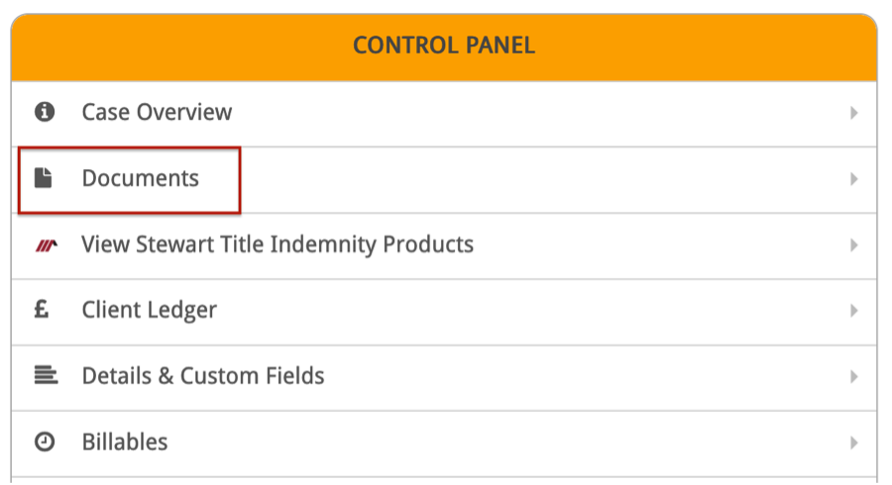
Once you are on the main case screen, scroll down until you see the Control Panel on the left-hand side.
Click ‘Documents’.
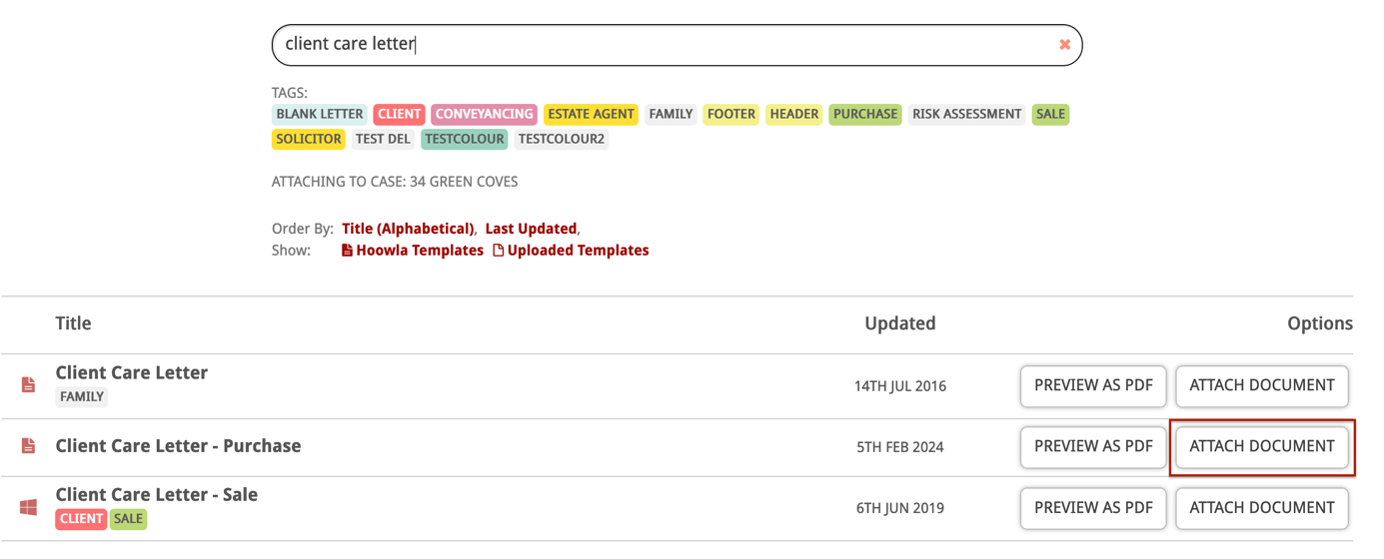
You’ll need to attach the template to the case. To do this, click ‘Attach’.

Search for the template you want to send, and then click ‘Attach Document’.
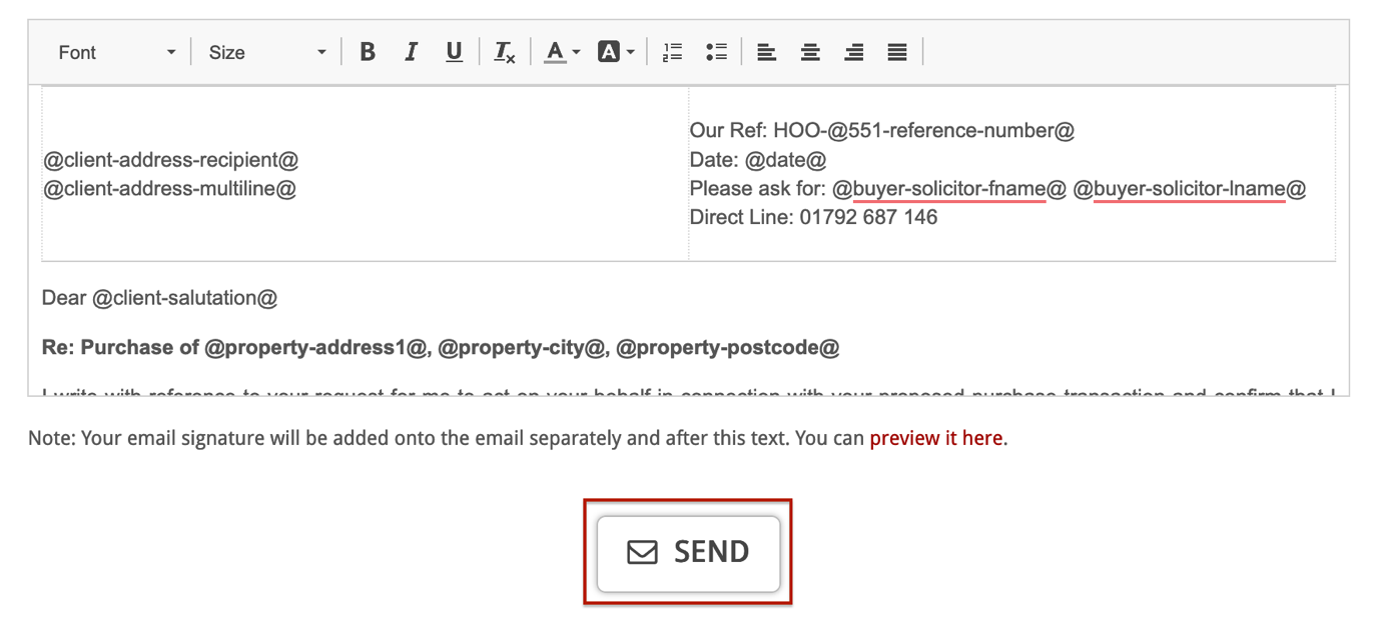
You should see a preview of the template. Click ‘Send’ at the top.

The people section will show people involved in the case. You can Click on them to select them.
If the person you want to send the document to isn’t shown here, you can enter their email address into the ‘To:’ text box.

The subject line has prefilled the information we entered in the previous section of this guide; the Case Name, followed by the Case ID.
You can also click into the ‘Subject:’ text box if you want to make any changes.

You can attach additional documents if needed.

You can choose whether to send the document as the body of the email or just as an attachment within the email and can also mark the email as important.

You can preview the email by clicking the button in the top right corner.

Once you are happy with the details you’ve entered, click Send.
You’ll see a banner confirming that your email has been sent.
